Your Cart

No products in the cart.

10 DIY Nurseries

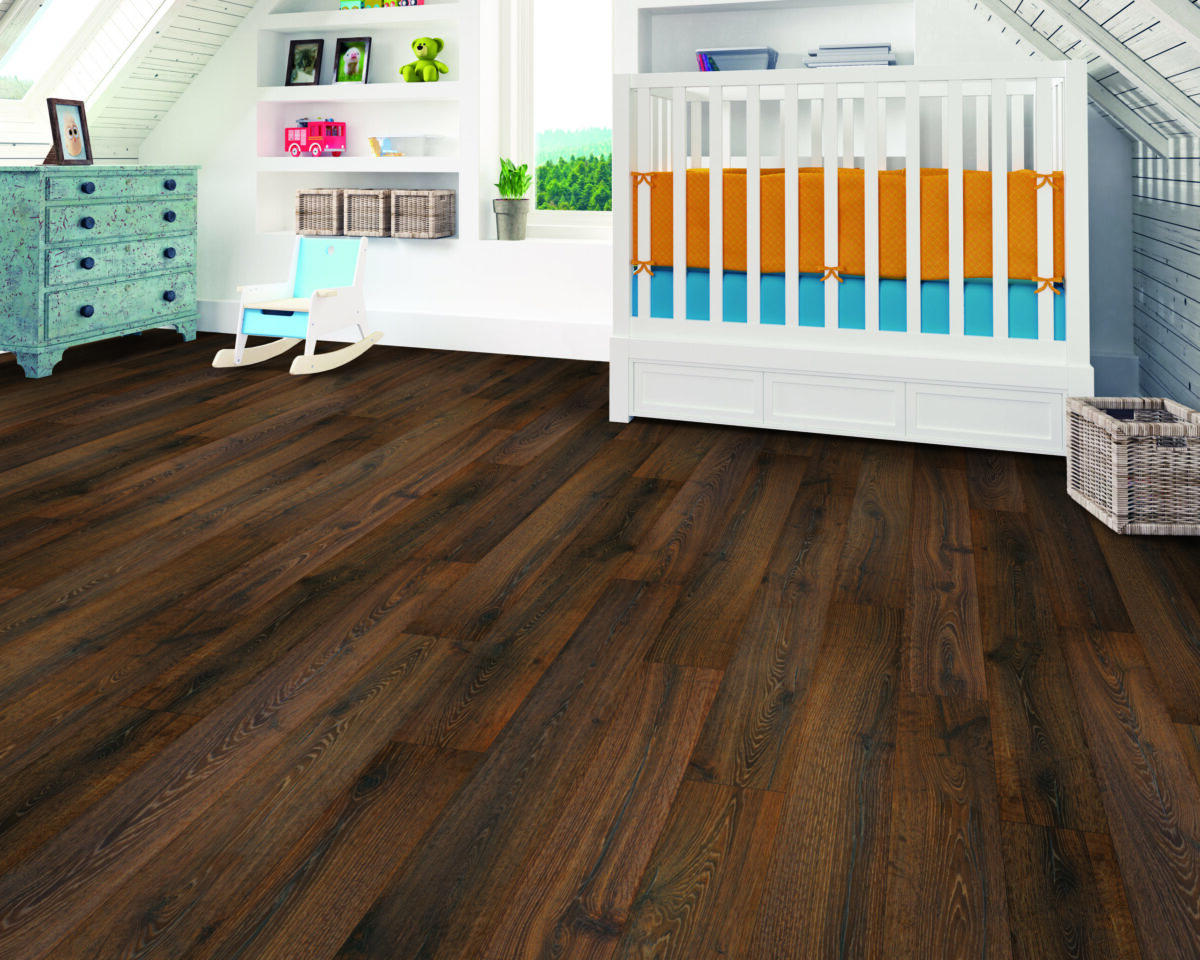
Decorating your little one’s nursery is an exciting time, but it can also require an excessive amount of creativity and craftsmanship. But no fear, we gathered our favorite bloggers to share their best nursery DIY tips and tricks since we all know the nursery can quickly become one of the messiest places in the house.

From bedtime accidents to diaper changes, odors and germs are probably also calling the nursery home. Pairing your nursery with the durable hard surface flooring from TORLYS backed with Microban’s antimicrobial product protection is a great way to keep bacteria and mold from growing with a beautiful finish.

These ten projects will add the cutest, most imaginative details to your baby’s space. Let’s get in DIY mode, you have a nursery to build!

Dive in here!

10 Tips for Keeping your Laminate Floors Beautiful

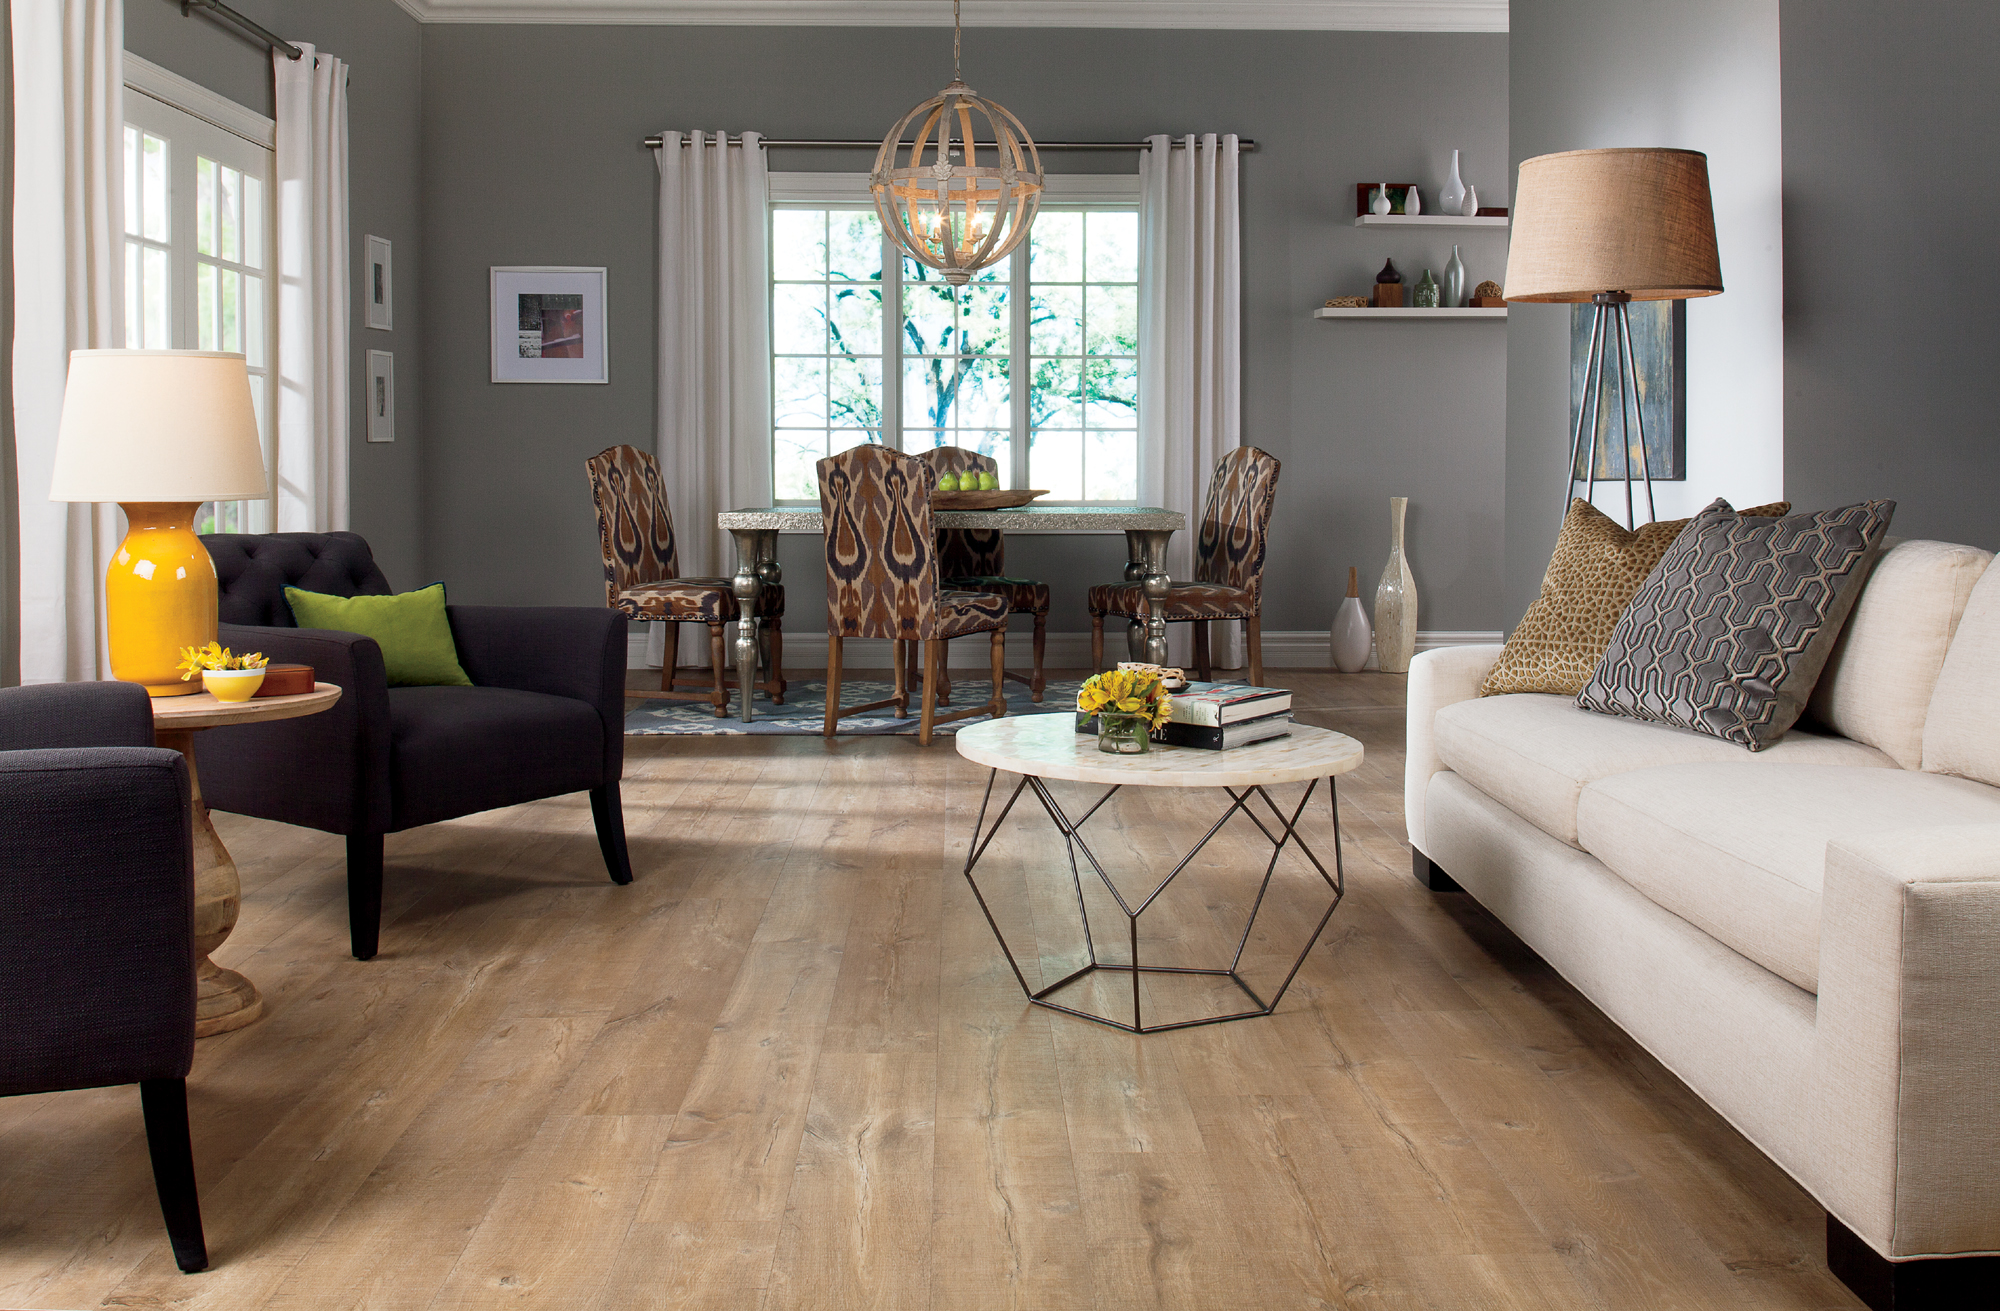
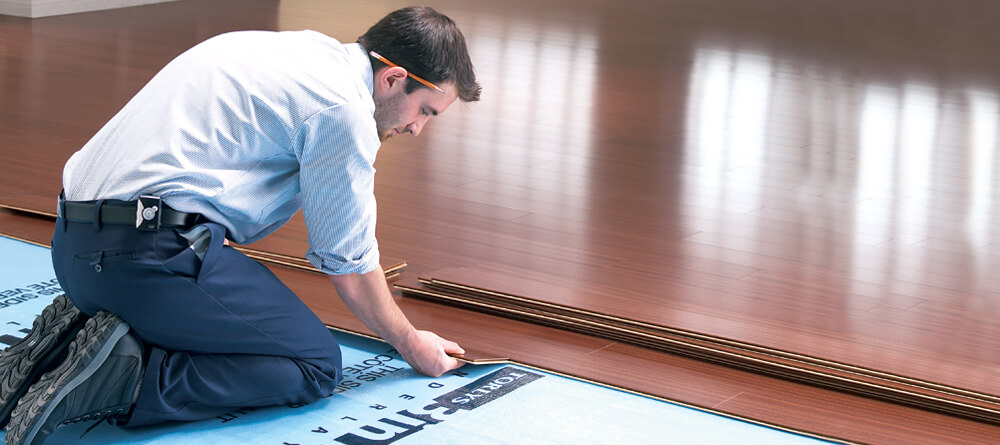
This blog was contributed by Jennifer Gervens. Jennifer is the author and owner of SweetTMakesThree.com.

Laminate flooring has become incredibly popular because it’s beautiful, durable, and fairly inexpensive. Like all floors, however, laminate requires a bit of special cleaning to keep it looking new and shiny. Laminate floors are not hard to keep clean, as long as you know the right way to do it.

Click to read: 10 Tips for Keeping Your Laminate Floors Beautiful!

With the proper care, your laminate flooring can look beautiful all the time! However, if your flooring is beyond help and you are ready to replace it, consider a new flooring product that is beautiful, durable and features proactive protection against the growth of mold and mildew.

TORLYS provides a wide selection of luxury vinyl flooring options with Microban technology incorporated into the cork backing, for a warmer, quieter and cleaner experience. See our full collection here: https://residential.torlys.com/collections/vinyl/

TORLYS Introduces “Shop Globally, Buy Locally” Program

“Shop@Home” initiative offers consumers free samples & advice from the comforts of home.

TORONTO, ON – April 2020 – TORLYS, a global flooring company specializing in beautiful, responsible flooring solutions, announced today the launch of its “Shop Globally, Buy Locally” program aimed at offering consumers flooring options from around the world that can be easily purchased locally and safely without ever needing to leave the house.

An innovation leader in the flooring industry, TORLYS quickly adapted to ever-changing industry needs as a result of the current global crisis by developing a program that simplifies the buying process, supports the Canadian economy by purchasing from local flooring dealers, and offers financial relief by waving sample charges and providing $50 mail-in rebates to those eager to tackle home flooring projects during this period of quarantine.

“As a result of Covid -19, we are all adjusting to the “New Norm” in purchasing all types of product. TORLYS is committed to putting the health and safety of our associates and customers first by offering safe and efficient delivery or pick-up options of our quality products, while still maintaining the highest level of service and support,” said Derek Brooks, Senior VP of Sales & Business Development at TORLYS, adding, “We are very excited about this new initiative that will help both consumers and our Floor Covering dealer partners.”

As an added offering for DIY installations, the “Shop Globally, Buy Locally” program includes a FREE TORLYS S.O.S. (Support-on-Site ) consultation video conference with a TORLYS Installation Expert who will coach the consumer through the beginning stages of installation and provide tips and tricks for a smooth install. Begin the at-home shopping experience here.

ABOUT TORLYS

Headquartered in Toronto, Ontario, TORLYS is a global flooring company that specializes in providing beautiful, responsible flooring solutions. TORLYS has been creating and delivering innovative flooring solutions to homeowners, builders, and property managers, using the latest technologies for 32 years and counting.

For further information, contact:

Leah Robinson, Digital Marketing Specialist

Email: Leah.Robinson@torlys.com Phone: 905-696-2399

Pro Secrets: Shopping List

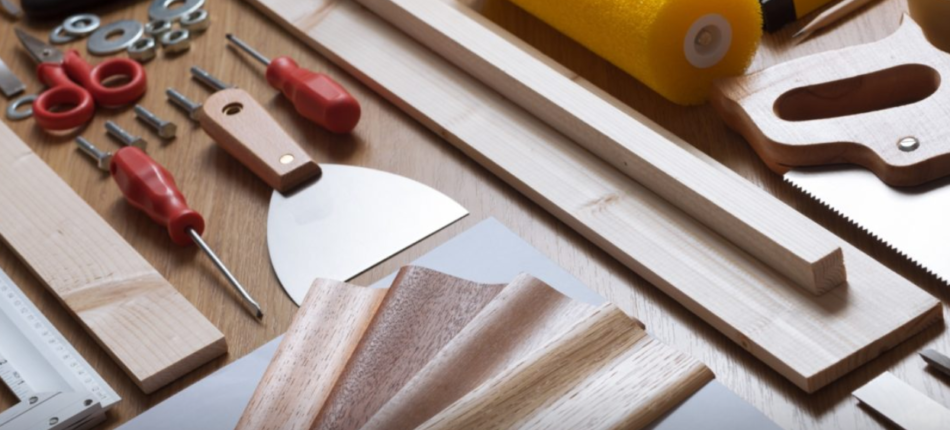
Just a few key details with the right products can make any job easier, longer-lasting and attractive to potential buyers. So when you’re planning your next project, use this cheat sheet to stretch your budget and make your hard work go further—without sacrificing quality or beauty.

Big Impact Items

  • PAINT: A subpar paint can clump, fade, streak or not fully cover the last coat. Set the tone for the room by sourcing a quality paint product without a premium price: look into professional brands marketed to industry experts as opposed to consumer-facing labels, which often command a higher price without improved performance.
  • FLOORING: This is the foundation of your room—and being able to clean your floors less means they’ll last longer. TORLYS offers flooring with built-in Microban® antimicrobial benefits, protecting your project from mold, mildew and bacteria at a better price point than unprotected brands.

Read the list of Hardware & Plumbing and Finishing Touches recommendations!

Small Home Renovation Details that Pay Off

Before you go tearing up that outdated kitchen and busting through your budget, take heart: just a few (more affordable) strategic upgrades could work just as hard for your home’s resell value as a full remodel. We’ve outlined a few key home renovation details that, combined, will make for a beautiful, durable facelift with added benefits for prospective homebuyers.

Four Small Home Renovations to Consider

1. Lay a Long-Lasting Home Renovation Foundation

If the old floor in your kitchen needs to go, but you’re not looking to spring for the expense of hardwood, consider vinyl flooring. Vinyl comes in hundreds of beautiful colors and styles and makes a fantastic first impression upon entering the kitchen. It’s also quicker and easier to install, which helps if you’re looking to move in or sell soon.

TORLYS combines beauty and resilience at an affordable price point and can transform a room without compromising values or budget. In addition, with built-in Microban® protection against mold, mildew and odor-causing bacteria, the added value of your kitchen home renovation to a prospective buyer is priceless: a healthier, cleaner home, with less germs for their family to worry about.

2. Swap in New Sinks and Fixtures

Two simple, yet stylish add-ons are sinks and faucets. Drop-in sinks, especially deep ones, are always desirable, and so easy—they literally “drop in” to a hole in the countertop, plus the installation costs very little. Faucets are fashion statements in themselves; look for adjustable, clean design with a striking silhouette, and if you choose a brand with the built-in antimicrobial protection of Microban®, that design aesthetic will be protected from mold and mildew for the product’s lifetime. Not a bad added benefit for a buyer looking for both beauty and ease of care!

3. Let There Be Light

Update lighting fixtures with brighter, more energy-efficient ones, and you’ll be helping the earth stay healthy, too. They’re no more expensive than traditional bulbs, but the luxe feel they bring justifies a higher asking price overall. While you’re at it, look into lighting switches and dimmers, which add a customized, personal touch. Finally, when installing, aim for a mix of natural, overhead, and under-cabinet lighting. Under-cabinet lights create drama and a warm glow, are easy to install and can be added under your existing upper kitchen cabinets.

4. Revamp with New Hardware

Whether your design aesthetic is brushed silver or glowing bronze, a simple swap of the right hardware adds a cohesive, elegant touch throughout your kitchen remodel without breaking the bank. Home renovation superstores carry a great selection of door, cabinet and drawer hardware.

Want more great and easy home renovation ideas? Explore The Cleaner Home for plenty of helpful DIY content.

How to Install Laminate Flooring in Your Home

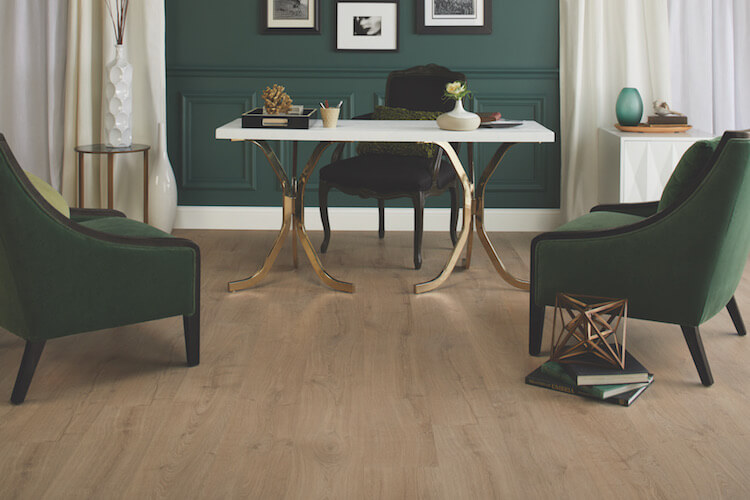
Are you getting ready to install new laminate floors in your home? Is it feeling a bit overwhelming trying to figure out the best way to tackle the job?

Installing your own laminate floors can seem like a daunting project. If you lack the ‘handy’ gene and the idea of manual labor has you breaking out in hives, you’ll likely want to leave this project to a professional. However, if you’ve successfully completed other home renovations and are up for a new challenge, laminate flooring installation is a great skill to add to your repertoire.

Start by Selecting the Right Materials

TORLYS laminate flooring is not only stunning but exceptionally strong. Because it’s a hardwearing surface, you’ll get to spend less time worrying about if it can handle what life throws at it, and more time admiring your handy-work. You can choose from 6 designer collections that were created for every style and lifestyle. Plus, with our Uniclic® laminate floors, you’ll be able to walk on your floors as soon as you’re done.

If you’re looking for a transition free option, TORLYS has a variety of products that will cover a space that is 50’ x 50’ without having to worry about transitions. Enjoy a seamless appearance from room to room with no “speed bumps” in the doorways.

Over 90% of residential applications can be installed transition-free, so your home is likely to be clear of speed bumps. Be sure to check out the detailed instructions included with your TORLYS laminate floors when completing a transition-free installation.

Install Laminate Flooring With These Tips

Measure Twice, Shop Once

Nothing will drag out the time it takes you to finish laying laminate flooring like multiple trips to the store to buy more planks. Start by calculating the total area of the room or rooms and add 5% for waste.

Prep the Planks

Think of it as acclimating your new floors. 24 hours prior to installation, place the closed packages in the middle of the room.

Ready the Room

Out with the old, in with the new! Remove existing carpet, baseboards, quarter-rounds and thresholds. This is also a great time to ensure all doors can still open and close after installing the floor (minimum 3/8” – 1cm clearance). Don’t forget to include your underlay.

Sub-Floors Subpar?

Now that you’ve removed the existing floor covering, it’s a great time to give your sub-floor a little TLC. Repair any defects in the sub-floor and make sure it’s clean, firm, flat, dry (less than 3% moisture on concrete, 10% or less on plywood) and smooth.

If there are any loose parts or you have a creaking floor, you should secure the sub-floor with nails or screws and, if necessary, apply a levelling compound.

Decide On a Direction

When you are installing new laminate floors in a room, you should install them parallel to window light. This will make the room look larger and make the floors look natural in your home.

If you are installing the same laminate flooring throughout your entire home, start at your front door. Your floors should run perpendicular to your front door, and in the same direction through your home. This will make your entryway look longer, and create a cohesive look in your home.

If you switch directions of flooring installation in each room, it will make your home look broken up and unintentional.

Don’t Forget the Underlay

Depending on the type of subfloor you’re working with, you’ll likely need underlay. TORLYS offers a variety of underlayment options that will provide a sound deadening barrier for your floor and will also help with insulation. If you live in a condominium or apartment, check with your condo board or management company as they may have specification requirements in regards to sound ratings for your underlayment choice.


Find your nearest TORLYS dealer and talk to them about your laminate project. They’ll be able to help you pick the right flooring and help you decide if this is the kind of project you can DIY, or if you require professional installation.

Tackling a laminate flooring project that involves stairs? Check back for an upcoming article on installing laminate on stairs.

Personalizing Your Space

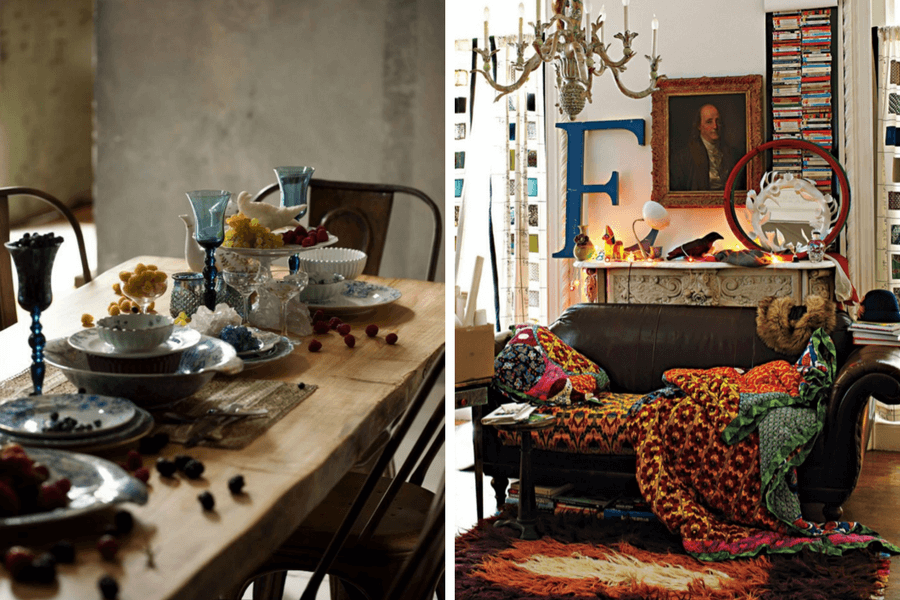
Whether you’ve just moved into your new home or you’re renting a temporary space, it’s important to add some personalization and make it yours. Instead of spending hours pouring over mountains of magazines to determine what you want your space to be, follow the latest “anti-design” trend and personalize your space.

In the 1960s it was called bohemian style, in the 1990s it was called “eclectic living”, and today we call it “curating your space”. If you search either term, the same design styles will appear because although the names are different, the rules are the same: create a space that expresses your personality and lifestyle.

This means personalizing your space to make it about what you like and putting your lifestyle first. So if you’re a bookworm, you might have a jumbled space with walls covered in bookshelves. And if you’re someone who loves the opera, you might have framed posters and memorabilia around your home. Either way, express who you are.

How to Personalize Your Space

Getting the eclectic look can seem confusing because it doesn’t follow a set list of rules. Follow these simple tips when designing your curated space while keeping your needs and passions in mind and your personalized space will come together perfectly.

  • Make your space all about you
  • Mix different textures (ie. leather, wool, cotton, silk)
  • Don’t buy matching furniture sets
  • Use pieces from different eras
  • Practice balance — eclectic style doesn’t mean anything goes
  • Don’t worry too much about symmetry

Find Your Focus

Don’t be shy or conservative with your choices. It is fun to add a significant or dramatic accessory that is your statement piece and that represents your lifestyle.

If you love the outdoors and cycling, hang your bike vertically on the entry hall wall. If music is your first love, cover the walls in sheet music, album covers, and vintage instruments.

How to Pick Patterns and Textures

Once you know what you’d like your space to focus on, it’s time to decide on a colour family (brights, neutrals, pastels, etc.) and a pattern and texture preference. If you never tire of colour and graphic patterns, keep your colour theme saturated and bold.

Start looking for textiles, artwork, and accessories that compliment that theme. Remember, your space is about function, so the comfort level of the textures you choose is key to your room. Stay soft and tactile.

How to Arrange Your Furniture

The shopping, collecting, and rearranging never ends with a personalized space. Just as we change our minds, we change our interior décor. As you are pulling your space together, stop frequently and assess your progress. The space should make you feel 100% at home, happy and totally comfortable. The only rule you shouldn’t break is to be true to what you like.

Examples of Personalized Spaces

1. Personalizing Your Space for Life, Work, and Play

The formula to personalizing your space is simple. The arrangement of the décor should suit how you have always wanted to live, work and play. If reading is your passion, then book-lined walls, floor lamps and big comfy chairs should be the focus; not a formal sofa or china cabinet.

Function over Design

The space is not large so the décor is set up to maximize personal comfort. The bed is positioned to take advantage of the view; lighting and wall shelves reflect an avid reader; and the colour story is classic and timeless. The small settee creates an ideal spot for reading if it is not quite time for bed. Image from Rize Studos.

Design to Entertain

This space is an ideal set up for entertaining guests. There are lots of seating options; no one sits outside the circle (including the family pup); and everyone has a spot for cocktails and munchies. The interior design reflects a boho feel with lots of mismatched colour and print. You can imagine the fun, expressive personality of the owner. Image from Aleteia.

2. Design by the Decades

Choosing an era or decade can be helpful for personalizing your space. If you have always liked the 1960’s then shopping garage sales for mid-century modern furniture and accessories is the answer. Research the era and start collecting iconic pieces that speak to the decade.

Personalize Vintage:

Every item within this room is rooted in traditional design and, if set up in perfect symmetry, the decor would feel old and stuffy. However, because the items are large in scale and positioned asymmetrically (off line), the room has a contemporary, over stuffed feeling of comfort.

Mid-Century Statement:

If the 50’s is an era you love, this space is perfect. The bold use of colour and pattern showcase the vintage furniture. The sparse use of artwork and accents reflect an “anti-design” attitude. The contrasting cement wall finish and distressed floor provide the perfect contrast. Definitely a one-of-a-kind living room. Image from Anthropology Home.

3. Picking Patterns and Textures

Once you have a focus, then decide on a colour family (brights, neutrals, pastels etc) and a pattern and texture preference. Start scouting textiles, artwork, accessories that compliment that theme. Texture is important. If comfort is key to the room, then textiles should be soft and tactile. If retro modern is the direction, then high gloss finishes and geometric shapes are key.

The shopping, collecting, and rearranging never ends with a personalized space. Just as we change our minds, so does our interior décor. As you are pulling your space together, stop frequently and assess your progress. The space should make you feel 100% at home. It should make you feel happy and totally comfortable. The only rule you shouldn’t break is to be true to what you like.

Don’t be shy or conservative with your choices! It is fun to add a significant or dramatic accessory that is your statement piece. If you love the outdoors and love to cycle, then hang your bike vertically on the entry hall wall. If music is your first love, cover the walls in sheet music, album covers, and vintage instruments.

Love of Colour and Print:

If you never tire of colour and love graphic patterns this space is a perfect personal reflection. The colours are saturated and bold without being too loud. The prints do not match, but they flatter each other and create a creative energy in the space.

Mix and Match (above left):

Personalize your brunch buffet or a seasonal table display by breaking the rules and mixing and stacking different shapes of serve ware. Scattered fruit, cheese, and nuts for mingling guests to munch on prior to the main meal. The mix of stemware with lower profile plates creates a better landscape. Add candles and flowers for a special occasion.

Bold Decisions (above right):

The giant “E” on the mantel could reflect a name or represent what they were going for like – “enjoy” or “everything (I love) ” There is no rhyme or reason to the décor except the scale, texture, and colour scheme are bold. It’s all vintage, but the era’s are 100’s of years apart. You could define the personality of the owner as confident and “one of a kind”. Images From Anthropology Home.

Personalizing Your Space

The names are different but the rules are the same: personalizing your space is all about what you like and putting your lifestyle first. Find your local TORLYS dealer to create the perfect backdrop for your personal style!

TORLYS Design Notes: Holiday Decorating

The weather is cooling down, and the elves are coming out of hiding. You know what that means! The holiday season has finally arrived, so it’s time to get ready for your festive gatherings. Here are our tips for making your home merry and bright.

Creating a Winter Wonderland

Christmas is upon us and we all face the challenge of trying to make the colour red fit into our existing décor. But there is no rule that says holiday decorating must include the commercial colour scheme of red, white and green.

Look to nature for inspiration and layer your home with shades of creamy white. Make sure to include lots of textured surfaces like fur, natural evergreens, knitted wool, and flannel. Add lots of twinkling lights and the result is warm, festive and cozy – the perfect setting for a holiday celebration!

Keeping it Simple

Avoid the stress of the season by keeping things simple. Look to the past for charming Christmas decorating ideas that the family will enjoy and that saves you time and money.

Stringing popcorn is fun and easy. Make sure the popcorn is a few days old if it’s stale it is less likely to break as you string it up! A round tip needle and heavy thread is all you need to create this charming addition to your tree.

Twist of Lime 

Update your Christmas décor by substituting the traditional red with a spirited lime green. Combine it with crisp white, sparkling silver and a touch of deep evergreen for contrast and the result is stunning.

Modern Holiday Expressions

Traditional holly berries and knitted stockings may not work in a modern home but you can still make a holiday statement by applying a key principle of modern design. Keep the theme focused and dramatic.

This spectacular charcoal grey and white hearth makes the perfect setting for a show of icy trees and sparkling lights. It may not work in your traditional home but in a contemporary room its spectacular!

Unlikely Places

Make a unique holiday statement by adding trim to unlikely places.  Fresh pine bows, pinecones, and candles in recycled mason jars make this décor easy and affordable. If your bench and staircase are located outside the cold weather will keep greenery fresh without water and lit candles will last forever!

How are you decorating for the holidays? Share your photos over on our Facebook page!

The Resale ROI: 11 Improvements For Your Home

If you’re selling your home, doing some simple renovations can increase your selling price and get your house off the market much faster. All you have to do is focus on certain rooms in your home, freshen things up with simple decorating tips, and consider changing your floors. With these tips, you’ll be able to entice buyers — and maybe even start a bidding war.

Put those open houses to an end by reading up on how to prepare your home for resale in order to increase your return on investment.

Kitchen Renovation Ideas

Real estate agents and professional stagers will tell you that the kitchen sells the home. Even if you don’t cook, or if potential buyers are not Martha Stewarts themselves, it pays to make your kitchen look appetizing.

Kitchen Facelift

Depending on the current state it’s in, some minor upgrades could be all you need. Add some new light fixtures, modern hardware, freshly painted cabinets and even some new tea towels to add inexpensive, fresh touches to your kitchen.

Bigger Impact

If your kitchen needs a little more TLC, installing a new backsplash or a new kitchen tap could make a big change and clean things up. Consider hiring a professional cleaning service to help you get your kitchen in order. Kitchen’s are usually large, busy rooms of the house and some extra help getting it ready could take a lot of stress off your shoulders.

Staging Makes a Difference

Preparing for your home’s photoshoot and for open houses also means going the extra mile. Put out some practical decorations such as fresh fruit and flowers, and some decoratively stacked cookbooks for a “lived in” feel without making anything look cluttered. By giving off a homey energy, buyers will be more likely to picture themselves living in your home, getting your closer to an offer!

Bathroom Renovation Ideas

When it comes to boosting the resale value of your home, the bathroom comes second right after the kitchen. Bathrooms have very high ROIs — between 70-100%, but they’re also one of the most expensive renovations per square foot.

Switch it Up

If you’re trying not to blow your budget, follow the same tips we mentioned for kitchens: change dated light fixtures, update hardware and put out new hand towels.

Time for an Upgrade

Replace damaged or outdated vanities, or just give the cabinets a fresh coat of paint if you’re looking to make a more permanent change. No matter what you do, make sure your bathroom is clean and fresh because grimy bathrooms don’t start bidding wars.

Rules For the Rest Of The Home

General Home Maintenance

There are universal decorating tips you can do to prepare to sell your home that are applicable to every room. Little changes can really freshen up your home and help you get the best ROI.

Curb Appeal

Improve your home’s exterior. Clean up and shrubs and bushes, cut your grass and add some new exterior lighting and house numbers. Painting the outside of your house can all give your home a modern look and attract attention and a front porch or back deck can add extra living space. An inviting front door also makes your home more appealing to buyers. A fresh coat of paint can really help with this.

Fresh Coat of Paint

Paint is one of the most cost-effective ways to give your home a facelift. Use neutral, light tones to appeal to as many potential buyers as possible and make things look bigger.

Appeal to Buyers’ Senses

Have a new home smell. Take out the garbage and recycling, remove any pet products like pillows, toys and bowls, and use simple clean aromas around the house (don’t over do it with complex air fresheners). If you need help with any of this, hiring a professional cleaning service is a great option.

Declutter Your Home

Organize your closets and remove any excess decorations and furniture to open up your floor space and make rooms look bigger. Remember — if it looks like you don’t have enough room for storage, buyers will think that the home is too small and won’t put in an offer. Showcase how you can maximize your home’s space by adding a closet organizer or making room under the stairs to store your holiday decorations. This will help buyers envision the home’s full potential.

Fix What’s Broken

Make repairs. If buyers see broken taps, loose kitchen cabinets or doors that don’t close easily, they might get scared and reconsider making an offer. Have all repairs don’t so that buyers can enter their potential new home without any mishaps.

New Floors

Just like a fresh coat of paint, new flooring can make a huge difference in your home. A popular choice is hardwood. Everyone—and we mean everyone—loves hardwood. In the kitchen, in the bedroom, in the hallway; you cannot have enough hardwood flooring in your home. Unfortunately, traditional hardwood can be expensive, and a big investment for a house you’re about to sell.

Luckily, there are other flooring options that have the same wood looks as hardwood for a fraction of the cost. Plus, they’re easier to maintain and are super durable. At TORLYS, we offer a range of products that look just like hardwood with the same wow factor that hardwood brings. Explore our collections to find the perfect floor for your home!

Professional vs. DIY flooring installation: Hire a Pro or Make it Your Show?

After deciding on which new floor to buy, homeowners are then faced with yet another big decision to make: do they install the new floor themselves or hire the dealer to do it for them?

First, there are three things that you need to be sure of when making your decision.

  1. What is your skillset?
  2. How much time do you have to get your floors installed?
  3. What is your budget for new floors?

You shouldn’t base your decision off one of these questions on its own, as they all tie together in the end. For now, let’s take a deeper look at them individually.

What to Consider When Deciding Between a DIY or Hiring a Professional

Your Skillset

Many people think starting a project on their own will be simple and they’ll have a beautifully renovated home on a budget. But depending on your skillset and the floor you’ve chosen, this is not always the case. If you’re not experienced with floor installation, doing this project on your own can potentially cost you a lot of time and wasted effort.

Besides taking your own skills into consideration, read reviews on the flooring you’ve chosen. Are they typically easy to install, or is professional installation recommend? Take this into account before making your decision.

If you’re looking for an easy-to-install floor, our unique TORLYS patent Uniclic® joint technology makes fitting floorboards together a breeze. Typically, the only tools you will need to install your TORLYS floor is a hammer, tape measure, saw (table or hand will do) and the TORLYS Installation Kit.

The Amount of Time You Have

If you’re rushing to get your renovation over with as soon as possible, a professional installation may be a safer option. Since professionals have to maintain a schedule to keep up with client demand, your project is less likely to drag on for months. Professionals are also experienced, making the job an everyday task that comes naturally to them.

If you have a lot of time on your hands, a DIY could save you some money to spend elsewhere. If you are highly skilled or have friends to give you a helping hand, the project could be finished quickly. On the other hand, if you’re the type to procrastinate or make mistakes along the way, paying for an expert’s work will save you lots of time.

Your Budget

Hiring a professional to complete a project costs money because you’re paying for their hard work and time. If you have a budget set aside for labour, hiring an expert can make your life a lot easier, especially if your dealer is handling the installation. They will come equipped with the appropriate tools, the floors, and the know-how to approach issues that may arise.

If you’re looking to save money on your renovation, a DIY is a great place to start. DIY expenses typically require the cost of supplies (the floors you order) and tool rentals, assuming you don’t have the specific tools that professionals would carry.

Either way, remember to factor a contingency into your budget.

Final Words of Advice

Know what you’re getting yourself into, know what you’re capable of, and do what’s best for you. If you’re still on the fence, talk to a TORLYS dealer . Tell them your budget, and what you’re looking for. They’ll be able to answer all your questions and recommend which floors are best to do on your own,. They may even provide a helpful tip or two on how to do the installation on your own.